The Reduce Palette Colours function is available on the Image menu.
There are a few reasons for which this option is useful...
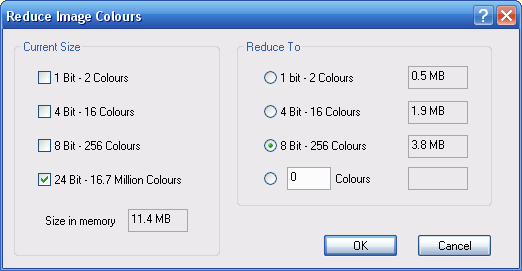
On the left side of this dialog, is the information about your image before processing. It shows the colour bit depth (number of bits per pixel) and the amount of RAM that is required to hold the image in memory.
On the right side of the dialog are the choices for reducing the number of colours. You can pick one of the standard colour depths (1 bit, 4 bit or 8 bit), or you can enter any number of required colours in the box at the bottom. In each case the amount of memory that would be required for the choice is shown.
When you press the OK button WinTopo Pro will examine the colours of every pixel on the image and compile a palette comprising only the number of colours which you have specified. These colours are optimally chosen for the image. Then each pixel as assigned one of these colours to match as closely as possible its original colour.
There is no preview for this option because the result is different when applied to only a small part of the image - the final palette can only be chosen by examining every pixel on the image. Remember, you can use the Undo function to re-try the option with a different choice.
This facility can also be used to increase the colour palette size (and the image bit depth), although you won't see any visible difference.
This can be useful for converting from a paletted (less than 24 bit depth) to a full colour (24 bit depth) image. You may need to do this so that you can use the Image Resize facility. To achieve this simply enter a value greater then 256 for the number of colours.
Related Topics: